How to Setup GitHub App for JupyterHub#
This guide will walk you through the process of setting up a GitHub App for your JupyterHub deployment.
Prerequisites#
A GitHub account
Administrative access to your JupyterHub deployment
Your JupyterHub domain/URL
Step 1: Create a New GitHub Organization#
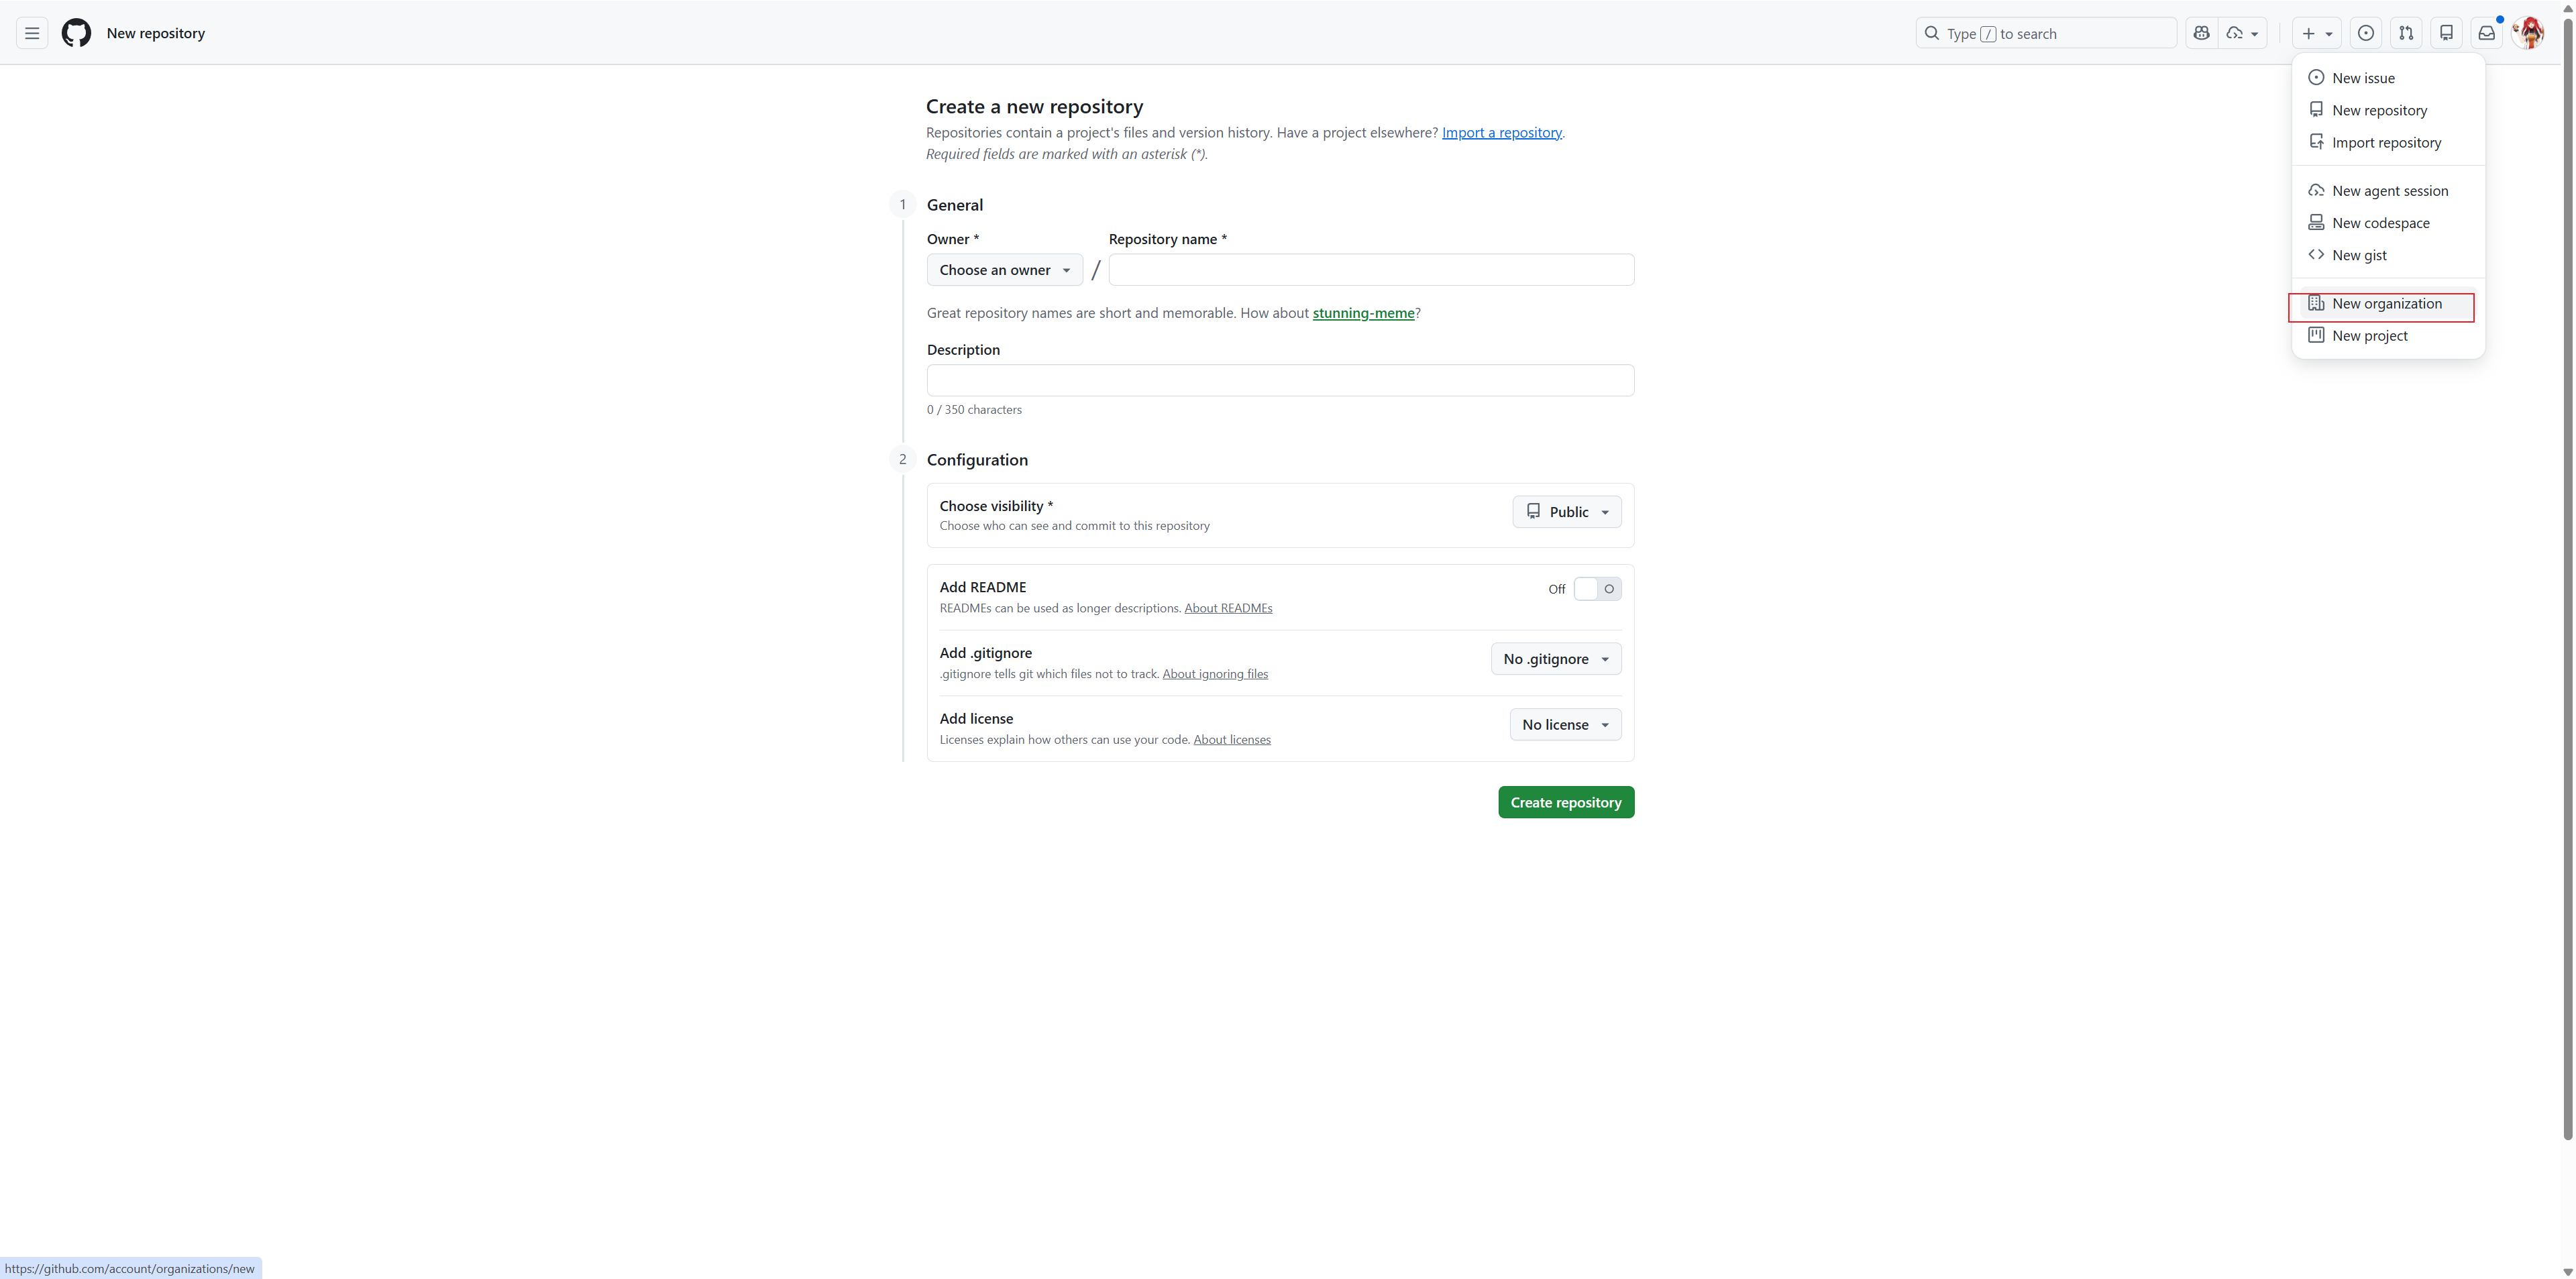
Go to github.com and click on
+icon in the top rightClick New Organization from the dropdown menu
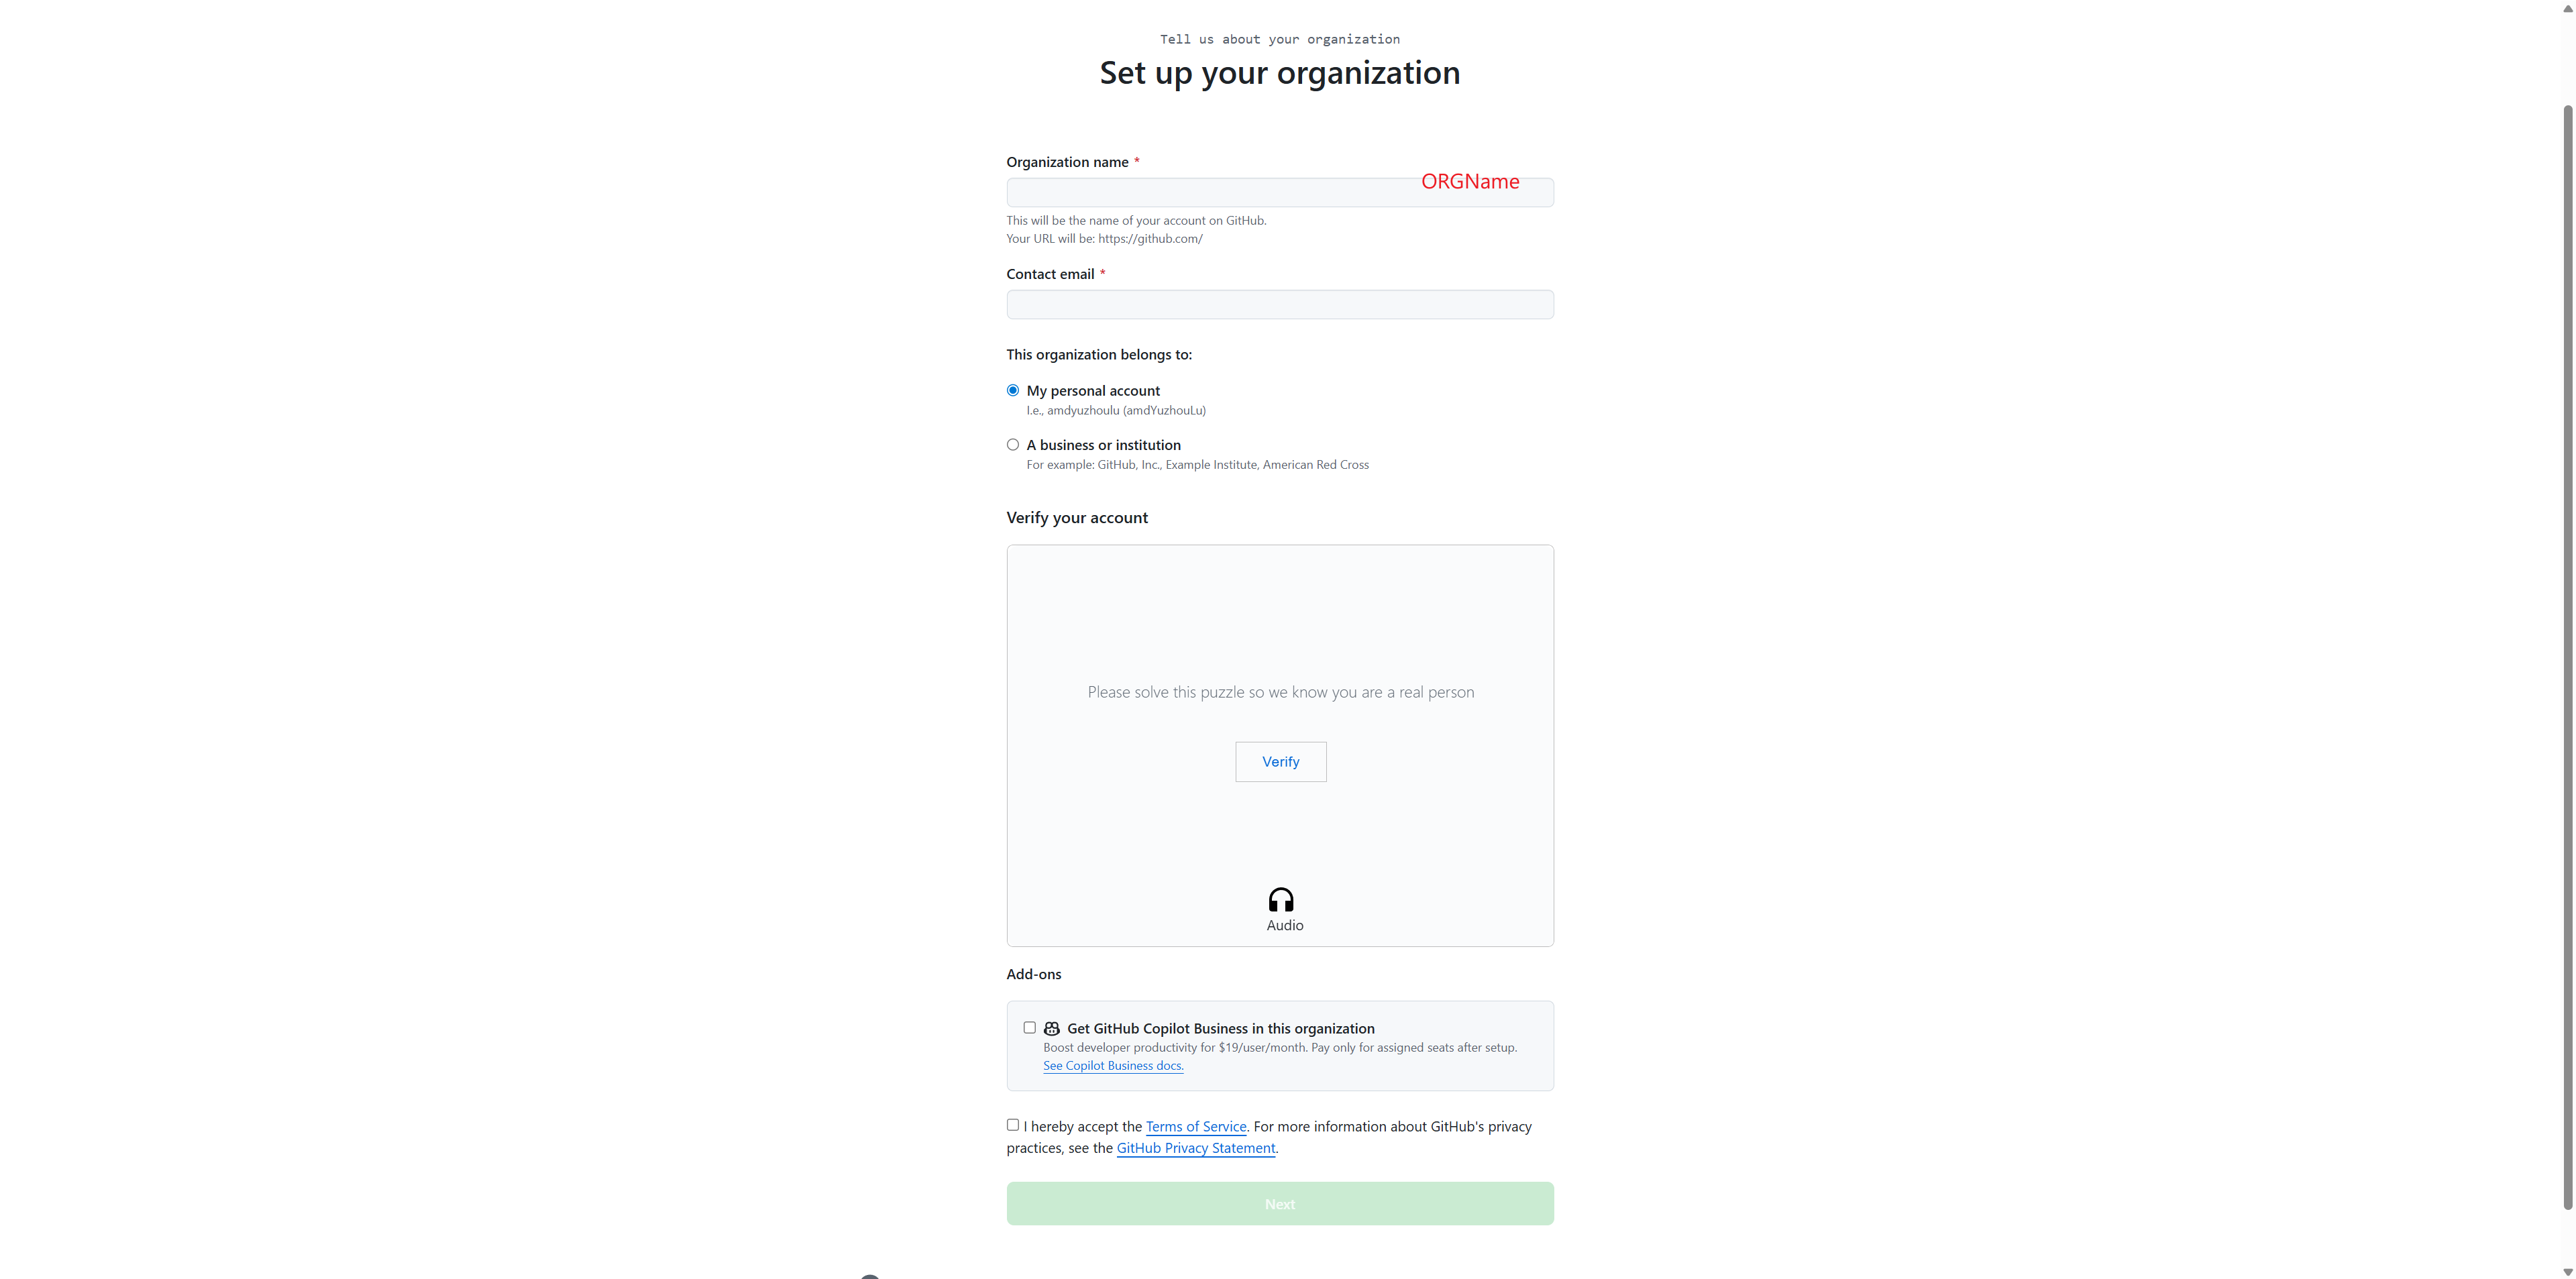
Fill in the organization details:
Enter your Organization name (e.g., “AUP-INT-TEST”)
Provide a Contact email
Select whether this organization belongs to “My personal account” or “A business or institution”
Complete the verification puzzle
Accept the Terms of Service
Click Next to create the organization
Step 2: Create Teams to Assign Different Permissions#
Teams allow you to organize members and control access to different resources in your JupyterHub deployment.
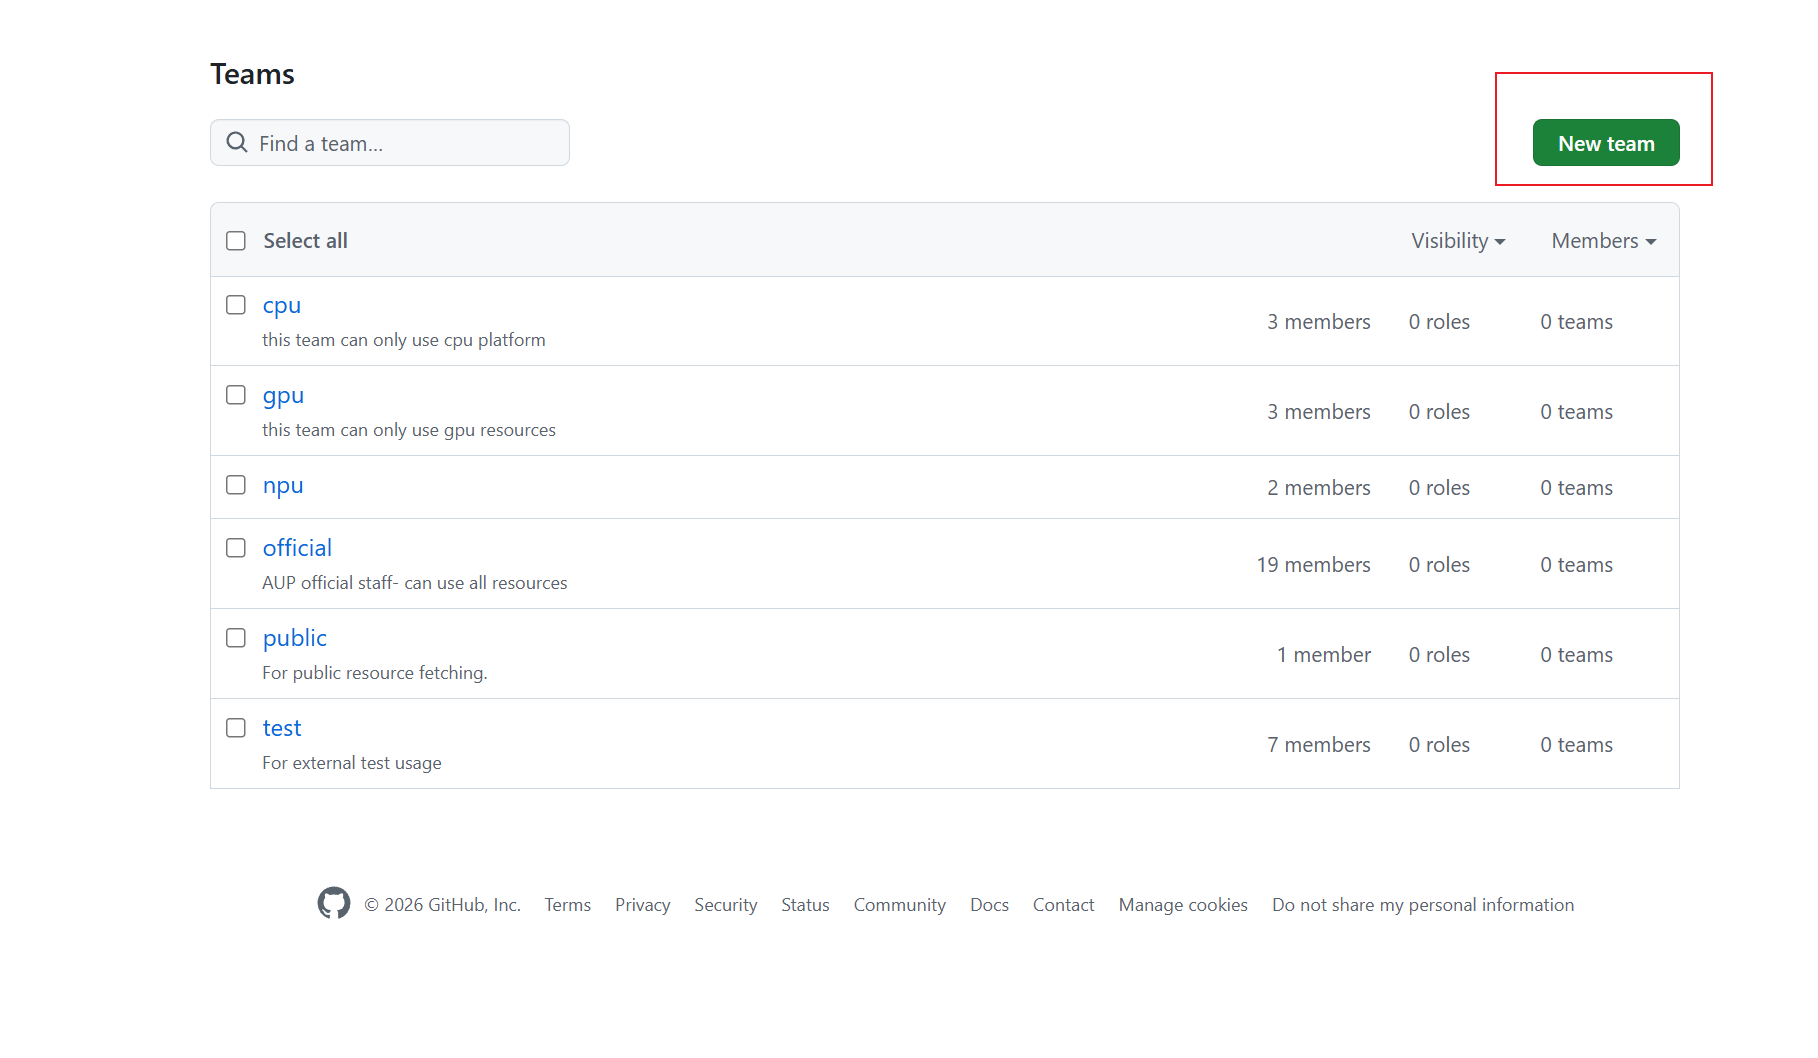
Navigate to your organization’s Teams page
Click the New team button in the top right
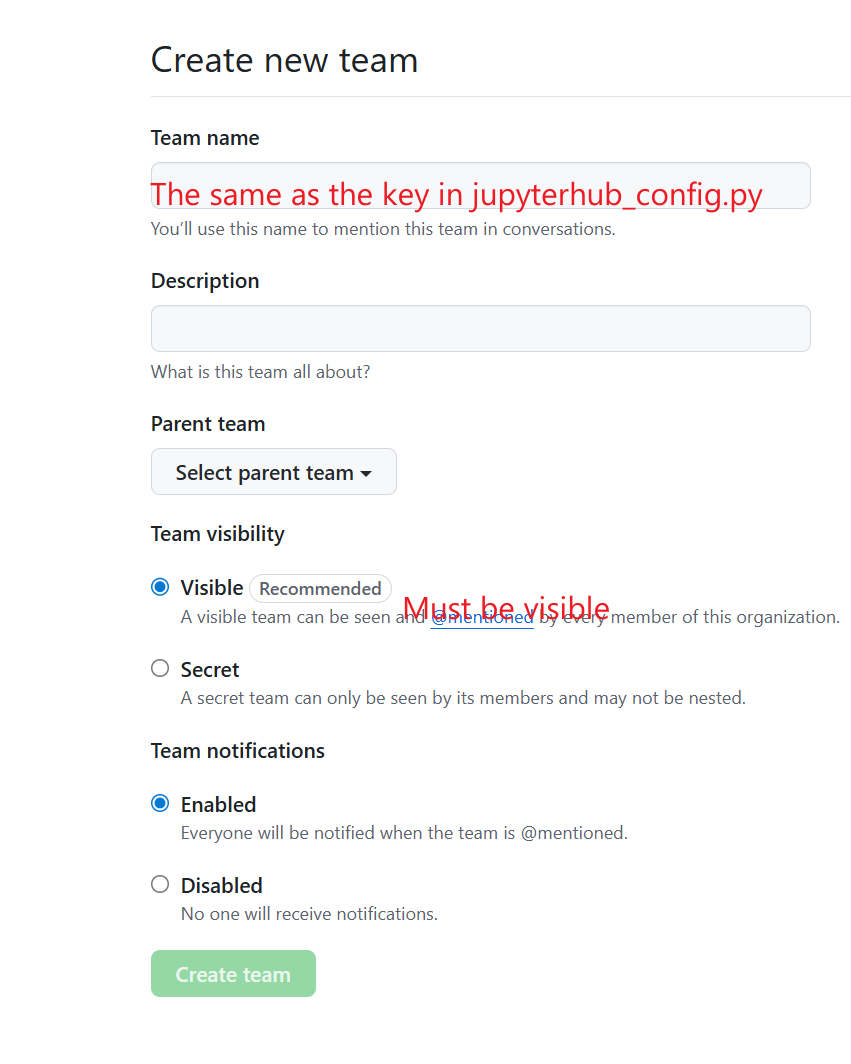
Fill in the team creation form:
Team name: Use the same name as the key in your
values.yamlcustom.teams.mapping(e.g., “cpu”, “gpu”, “npu”, “official”)Description: Add a description of what this team is for
Team visibility: Select Visible (recommended) - this allows all organization members to see the team
Team notifications: Choose whether to enable notifications
Click Create team
Repeat this process to create all the teams you need for your resource mapping (e.g., cpu, gpu, npu, official, public, test)
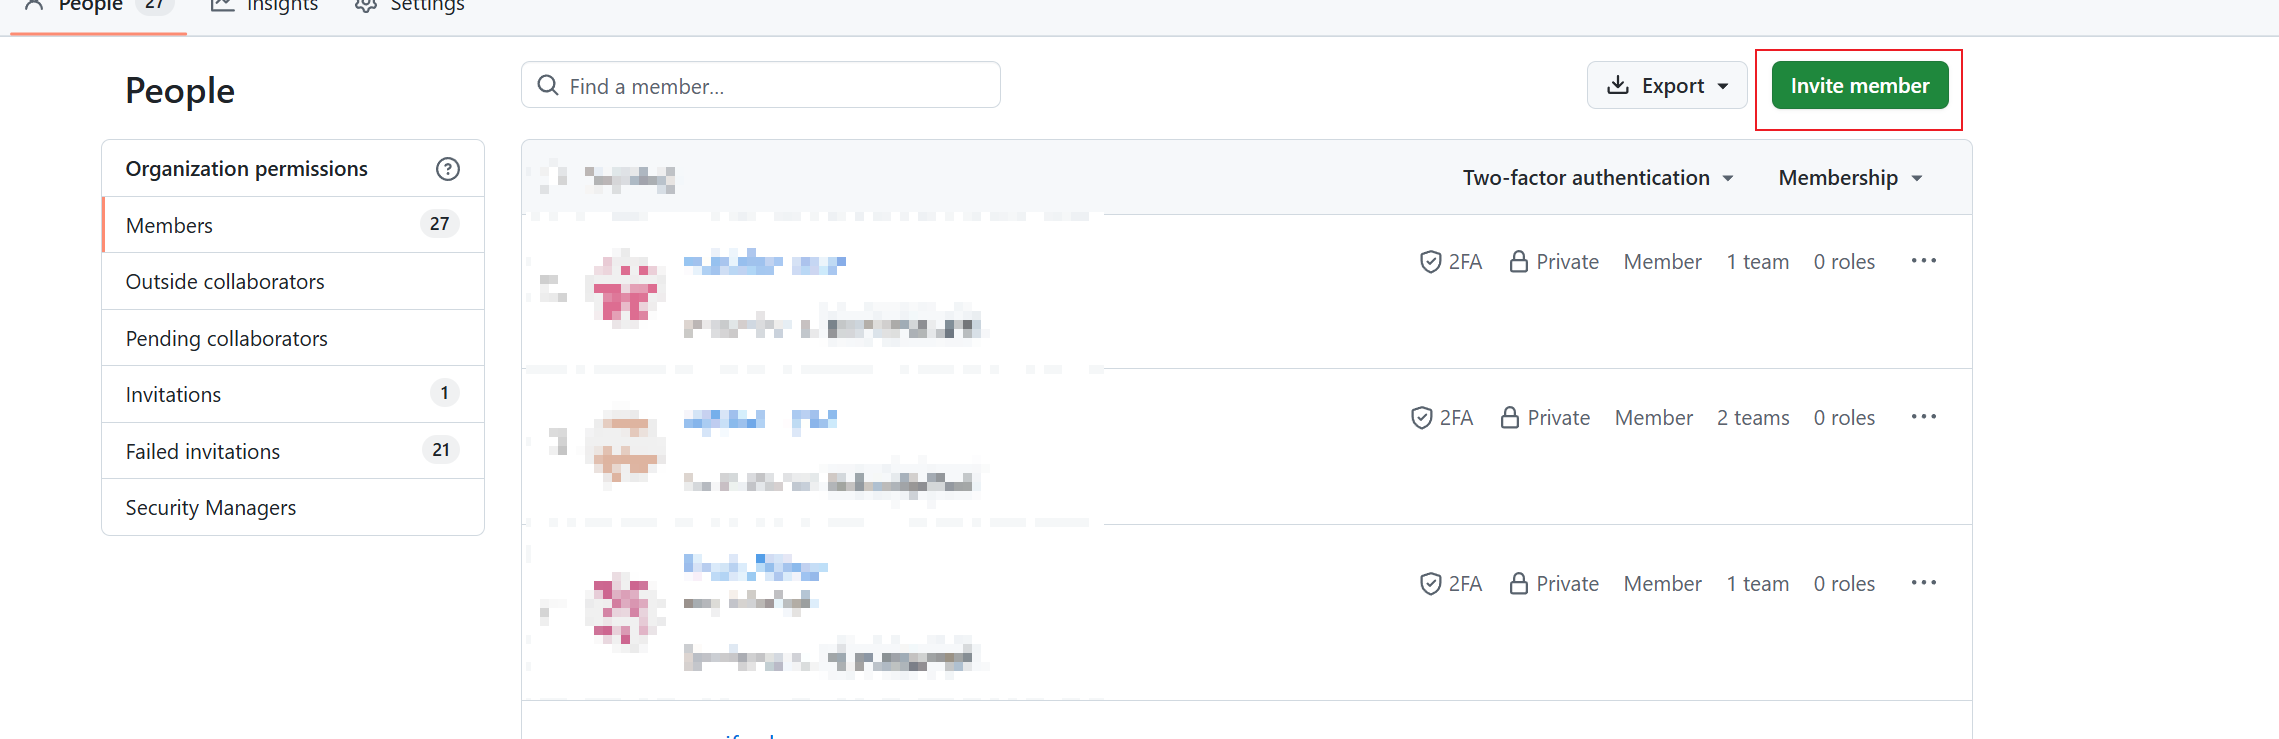
Step 3: Add Members to the Organization#
Go to the People tab in your organization
Click the Invite member button in the top right
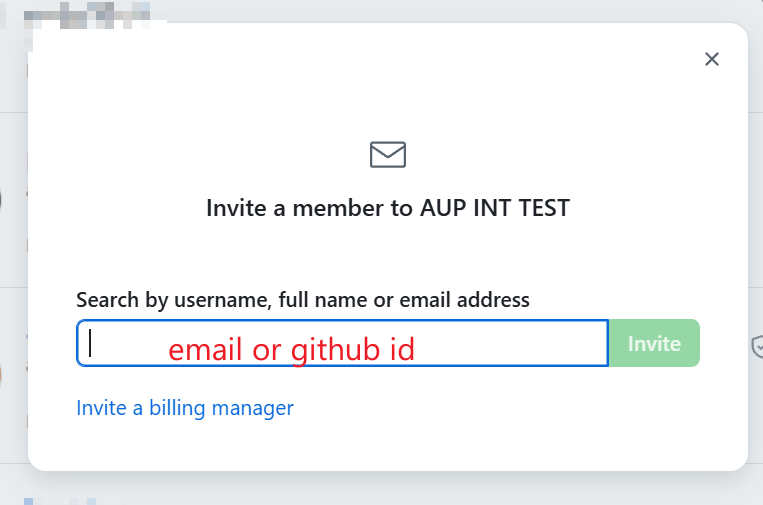
In the invitation dialog:
Enter the member’s email address or GitHub username
Click Invite
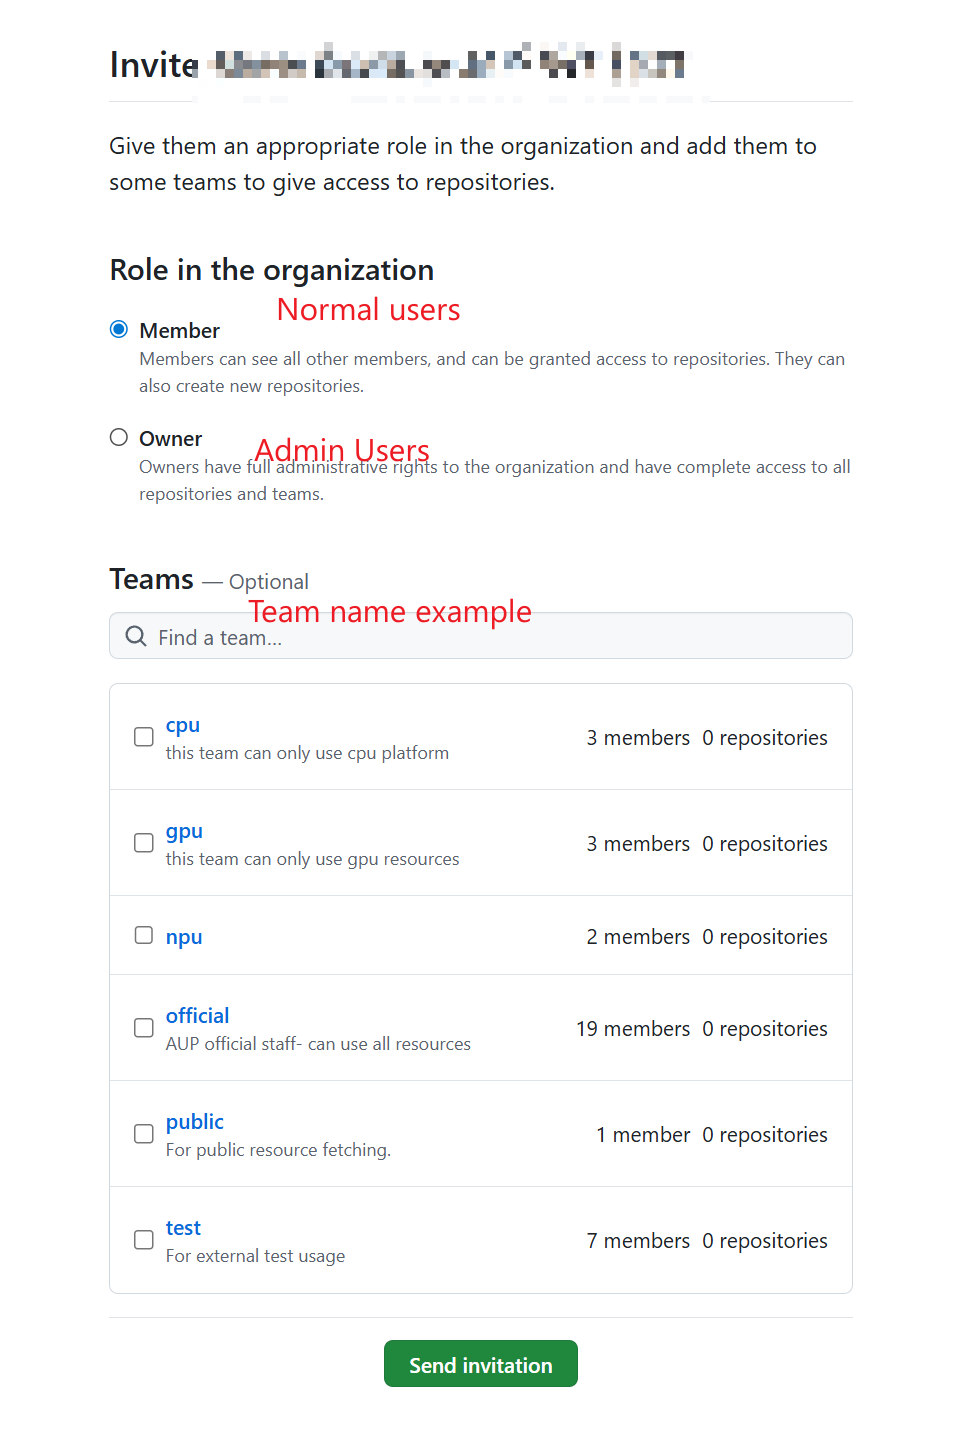
Assign the member to appropriate teams and roles:
Role in the organization:
Select Member for normal users (can see all members and be granted access to repositories)
Select Owner for admin users (full administrative rights to the organization)
Teams: Select the teams this member should belong to (e.g., cpu, gpu, official)
Click Send invitation
Repeat this process for all members you want to add to your organization
Step 4: Create a GitHub App#
Note
GitHub Apps are the recommended way to integrate with GitHub. They are created under the organization (not a personal account), support fine-grained permissions, and enable private repository access for users.
Go to your organization’s GitHub App creation page:
https://github.com/organizations/<your-organization>/settings/apps/newFill in the basic information:
GitHub App name: A unique name (e.g., “auplc-hub”)
Homepage URL: Your JupyterHub URL (e.g.,
https://your.domain.com)Callback URL: Your OAuth callback URL
Single auth:
https://<your-domain>/hub/oauth_callbackMulti auth:
https://<your-domain>/hub/github/oauth_callback
Expire user authorization tokens: Check (recommended)
Request user authorization (OAuth) during installation: Check
Webhook -> Active: Uncheck (not needed)
Set permissions:
Repository permissions:
Contents: Read-only (for cloning private repos)Metadata: Read-only (selected by default)
Organization permissions:
Members: Read-only (for team-based access control)
Installation scope:
Where can this GitHub App be installed?: Any account
Click Create GitHub App
After creation, note down the following:
Client ID: Displayed on the App’s General page (e.g.,
Iv23liXXXXXX)Client secret: Click Generate a new client secret – copy it immediately
App slug: The URL-safe name in the App’s URL (e.g.,
auplc-hub)
Step 5: Configure JupyterHub#
Open your deployment configuration file (
runtime/values.yamlor environment-specific override)Add the GitHub App configuration:
custom:
  gitClone:
    githubAppName: "your-app-slug"  # Enables private repo access & repo picker

hub:
  config:
    GitHubOAuthenticator:
      oauth_callback_url: "https://<Your.domain>/hub/github/oauth_callback"
      client_id: "<GitHub App Client ID>"
      client_secret: "<GitHub App Client Secret>"
      allowed_organizations:
        - <YOUR-ORG-NAME>
      scope: []  # GitHub App uses App-level permissions, not OAuth scopes
Note
scope: []is correct for GitHub Apps. Permissions (Contents, Members, etc.) are configured in the App settings on GitHub, not via OAuth scopes.Configure team-to-resource mapping in
values.yaml:custom: teams: mapping: cpu: - cpu gpu: - Course-CV - Course-DL - Course-LLM official: - cpu - Course-CV - Course-DL - Course-LLM
Deploy:
helm upgrade jupyterhub ./chart -n jupyterhub -f values.yaml
Verification#
Navigate to your JupyterHub URL
You should see a “Sign in with GitHub” button
Click it and authorize the application
You should be redirected back to JupyterHub and logged in
Verify that users can only access resources based on their team membership
Troubleshooting#
OAuth callback error: Ensure your callback URL exactly matches what you configured in GitHub (including HTTPS)
Organization not found: Verify the organization name in your configuration matches your GitHub organization exactly
Users can’t access resources: Check that users are added to the correct teams in GitHub
Authentication fails: Verify your Client ID and Client Secret are correct and the secret hasn’t expired
Migrating from OAuth App to GitHub App#
If you are currently using a legacy GitHub OAuth App, follow these steps to migrate.
Why Migrate?#
OAuth App |
GitHub App |
|
|---|---|---|
Ownership |
Personal account only |
Organization-level |
Permissions |
Coarse OAuth scopes ( |
Fine-grained per-permission (e.g. Contents: read-only) |
Private repo access |
Requires |
Per-repo authorization by user |
Staff changes |
App lost if owner leaves |
Org admins retain control |
Migration Steps#
Create a GitHub App under your organization (see Step 4 above)
Update
values.yaml– change 3 fields, add 1:custom: gitClone: githubAppName: "your-app-slug" # NEW -- add this hub: config: GitHubOAuthenticator: client_id: "<GitHub App Client ID>" # CHANGE -- from OAuth App's ID client_secret: "<GitHub App Client Secret>" # CHANGE -- from OAuth App's secret scope: [] # CHANGE -- was [read:user, read:org] # allowed_organizations, oauth_callback_url -- keep unchanged
Deploy:
helm upgrade jupyterhub ./chart -n jupyterhub -f values.yaml
User impact:
Existing logged-in sessions continue to work
On next login, users go through the new GitHub App OAuth flow (same experience)
Users who want private repo access can authorize repos on the spawn page
Clean up: Once all users have re-logged, delete the old OAuth App from GitHub (Settings -> Developer settings -> OAuth Apps)
Security Best Practices#
Always use HTTPS for your JupyterHub deployment
Keep your Client Secret secure and never commit it to version control
Regularly review organization members and their team assignments
Use environment variables or secret management systems for storing OAuth credentials
Create the GitHub App under the organization (not a personal account) so it survives staff changes
Set minimal App permissions – Contents (read-only) and Members (read-only) are sufficient