3 Node Mini-Cluster Example#
This is a concrete, end-to-end example of building a small multi-node K3s cluster by PXE-netbooting diskless machines, then deploying AUP Learning Cloud on top of it. One service machine boots the other machines over the network, and those machines auto-join the K3s cluster with no per-machine OS install. It walks one reference topology from bare machines all the way to a JupyterHub login that can spawn a GPU notebook on a netbooted node.
The pxe_controller role turns the service machine into the PXE controller. It installs and configures dnsmasq as Proxy-DHCP + TFTP, builds an NFS root filesystem under /srv/nfs/rootfs with debootstrap, copies the netboot kernel/initrd and BIOS/UEFI boot menus to /srv/tftp, and prepares Apache to serve the K3s join credentials under /k3s/.
Architecture#

In this example only the service machine (AIPC 1) runs an operating system you install and manage with Ansible. AIPC 1 hosts the PXE controller and the single-node K3s server, and every Ansible playbook in this guide runs against AIPC 1.
The other machines (the agents) are diskless: they have no installed OS and are not managed by Ansible. They netboot from AIPC 1 and join the cluster automatically through the k3s-auto-join.service baked into the netboot rootfs.
Note
The standard k3s-ansible flow in this repo (pb-k3s-site.yml with server and agent inventory groups over SSH) is designed for the case where every node already has an OS installed. This PXE example is different: the agents have no OS, so you do not put them in the agent inventory group. You only configure AIPC 1 as the server, and the agents come up by netboot.
The netbooted agents follow this boot path:
Firmware asks the LAN DHCP service for an IP address.
dnsmasqon AIPC 1 replies with PXE boot metadata (Proxy-DHCP).The agent downloads
pxelinux.0for BIOS boot orgrubnetx64.efifor UEFI.The boot menu loads
vmlinuzandinitrd.imgfrom TFTP.The kernel mounts the read-only NFS rootfs from
/srv/nfs/rootfs.overlayrootprovides a writable tmpfs layer.set-hostname.servicesets the hostname toagent-<MAC>.k3s-auto-join.servicefetches the K3s token fromhttp://<SERVICE_IP>:8080/k3s/tokenand joins the server athttps://<SERVICE_IP>:6443.
What To Prepare#
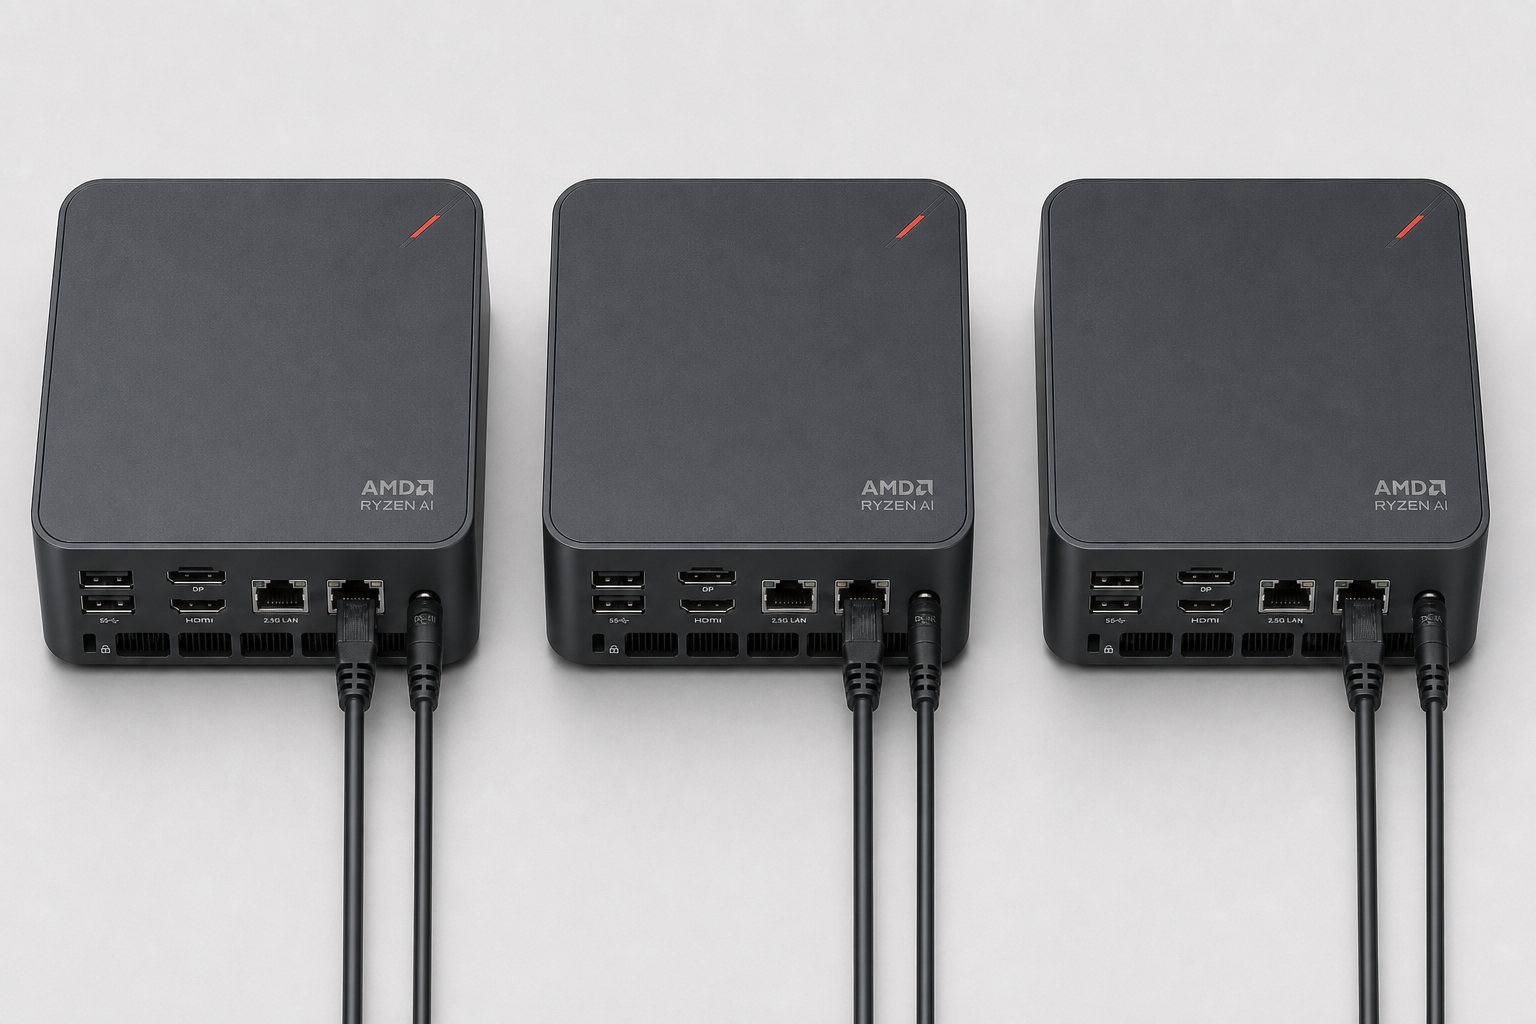
A minimal example uses three machines on the same LAN:
Role |
Count |
Notes |
|---|---|---|
Service machine (AIPC 1) |
1 |
Runs the PXE controller and the single-node K3s server. Needs a local disk and a reserved/static IP. The only Ansible-managed node. |
Agent (AIPC 2, AIPC 3) |
2+ |
Diskless workers that netboot. No OS install, not managed by Ansible. |
You also need, already in place on the LAN:
A DHCP server (router/firewall/switch).
dnsmasqhere runs in Proxy-DHCP mode and does not hand out IP leases — it only adds the PXE boot information on top of your existing DHCP.Internet access from the service machine, to pull packages and build the rootfs.
Per-machine requirements:
Service machine: Ubuntu 24.04, a reserved/static IP, a local disk, and network reachable by the agents.
Agents: a working in-kernel network driver (this role ships no vendor drivers — add the module to
pxe_initramfs_modulesif needed), and a local disk if you want persistent K3s state across reboots.All machines: UEFI Secure Boot disabled in firmware (the UEFI path boots GRUB directly without a Microsoft-signed shim), and the ability to network-boot (PXE) from firmware.
Warning
No site values (IPs, subnet, SSH keys, passwords, tokens) ship in this repo. You set them in the inventory and the playbook, and the role fails fast if a required value is empty. Keep real secrets out of version control.
Step 1 — Prepare The Service Machine#
Install Ubuntu 24.04 on AIPC 1 and give it a stable IP. The same IP is used for the PXE controller, NFS rootfs, Apache token endpoint, and K3s API endpoint.
Install the operator tools and the PXE host packages (the role does not install its own host packages):
sudo apt update
sudo apt install -y git ansible curl ca-certificates jq \
  dnsmasq pxelinux syslinux-common apache2 \
  nfs-kernel-server debootstrap \
  grub-efi-amd64-signed shim-signed
Find the interface, subnet, and DNS you will use, and record them for Step 3:
ip -br addr
ip route
Clone the repository on AIPC 1 and work from its root:
git clone <REPO_URL> ~/aup-learning-cloud
cd ~/aup-learning-cloud
Enable passwordless root SSH#
The inventory uses ansible_user: root (Step 2), so Ansible connects to the target as root over key-based SSH. Before running any playbook you must give root a passwordless SSH login, otherwise the very first task (“Gathering Facts”) fails with UNREACHABLE! ... Permission denied (publickey,password).
Because AIPC 1 manages itself in this single-machine topology, authorise your own SSH key for the local root account:
sudo install -d -m 0700 /root/.ssh
sudo tee -a /root/.ssh/authorized_keys < ~/.ssh/id_ed25519.pub >/dev/null
sudo chmod 0600 /root/.ssh/authorized_keys

# verify root SSH works without a password
ssh root@<SERVICE_IP> true && echo root-ssh-ok
Note
Because the service machine is also the Ansible target, you can avoid SSH entirely by telling Ansible to run on the local host. Add ansible_connection: local to the host vars in inventory.yml (Step 2); Ansible then executes tasks directly without an SSH round-trip and no root SSH setup is needed.
Step 2 — Configure The Inventory#
Edit deploy/ansible/inventory.yml. You define two things: the pxe_controller group (used by the PXE playbook) and the K3s server group (used to install the single-node master). AIPC 1 is the only host in both, and the agent group stays empty because the netboot agents are not Ansible-managed.
k3s_cluster:
  children:
    server:
      hosts:
        aipc1:
          ansible_host: <SERVICE_IP>
    agent:
      hosts: {}        # diskless netboot agents auto-join; do NOT list them here
  vars:
    ansible_user: root
    k3s_version: v1.32.3+k3s1
    token: "<paste-a-strong-random-token>"   # openssl rand -base64 64
    api_endpoint: "{{ hostvars[groups['server'][0]]['ansible_host'] | default(groups['server'][0]) }}"

pxe_controller:
  hosts:
    aipc1:
      ansible_host: <SERVICE_IP>
  vars:
    ansible_port: 22
    ansible_user: root
Note
Keep k3s_version here in sync with pxe_k3s_version in the PXE playbook (Step 3). K3s requires every agent to be the same version as, or older than, the server.
Step 3 — Configure The PXE Controller Playbook#
Edit the vars: block in deploy/ansible/playbooks/pb-pxe-controller.yml. The required values are empty by default — set them all:
pxe_rootfs_force_rebuild: true        # true for the first build

pxe_network_interface: "enp1s0"       # service-machine NIC (from Step 1)
pxe_subnet: "192.168.1.0/24"          # node subnet, CIDR
pxe_dns_servers: "8.8.8.8,8.8.4.4"    # DNS for the rootfs

pxe_controller_ip: "192.168.1.10"     # this service machine's IP
pxe_k3s_server_ips:
  - "192.168.1.10"                    # K3s server IP (this machine)

pxe_k3s_version: "v1.32.3+k3s1"       # must match inventory k3s_version

pxe_rootfs_authorized_keys:
  - "ssh-ed25519 AAAA... you@host"    # at least one key is required
Note
pxe_gateway is optional and currently informational only. pxe_rootfs_password can stay empty to keep root password login disabled (key-only). Use pxe_rootfs_force_rebuild: true for the first build, then set it back to false once the rootfs is stable so you do not rebuild it underneath running agents.
Step 4 — Run The PXE Controller Playbook#
cd ~/aup-learning-cloud/deploy/ansible
ansible-playbook -i inventory.yml playbooks/pb-pxe-controller.yml
The role builds the NFS rootfs, installs the agent boot services into it, pins and installs the K3s agent binary, copies the kernel/initrd and boot menus to /srv/tftp, configures NFS and dnsmasq, and prepares the Apache /k3s/ directory. When it finishes it prints a summary with the controller IP and a short next-steps list.
Step 5 — Verify The Controller#
systemctl is-active dnsmasq nfs-kernel-server apache2
showmount -e localhost
ls -l /srv/tftp/pxelinux.0 /srv/tftp/grubnetx64.efi /srv/tftp/vmlinuz /srv/tftp/initrd.img
curl -I http://127.0.0.1:8080/k3s/
Expected: dnsmasq, nfs-kernel-server, and apache2 are all active; showmount lists /srv/nfs/rootfs exported to your subnet; the four boot files exist under /srv/tftp; and http://127.0.0.1:8080/k3s/ returns 403 (the directory exists but is empty and not listable). The token endpoint is 404 until you publish it in Step 7.
Note
The role serves the /k3s/ credential endpoint on port 8080, not 80. This lets the PXE controller share the host with k3s, whose Traefik / ServiceLB owns host ports 80/443 for cluster ingress. The port is set by pxe_web_port in the PXE playbook.
Step 6 — Install The Single-Node K3s Server#
Install the K3s server on AIPC 1 using the repo’s existing k3s-ansible flow. With the server group pointing at AIPC 1 and the agent group empty (from Step 2), this installs a single-node master and configures kubectl for your user automatically.
Run the playbooks without sudo. With key-based root SSH (Step 1), Ansible already connects as root; prefixing sudo would make it use the local machine’s root SSH key instead and fail authentication.
cd ~/aup-learning-cloud/deploy/ansible
ansible-playbook -i inventory.yml playbooks/pb-base.yml
ansible-playbook -i inventory.yml playbooks/pb-k3s-site.yml
The K3s server install configures kubectl for your user and writes ~/.kube/config. Point KUBECONFIG at it once so every later kubectl / helm command works without sudo (add this to your ~/.bashrc to make it stick):
export KUBECONFIG=~/.kube/config
Verify the server is up and kubectl works:
kubectl get nodes -o wide
Note
kubectl get nodes -o wide and sudo k3s kubectl get nodes -o wide are equivalent — the first uses your user kubectl against ~/.kube/config, the second uses K3s’ bundled kubectl against the root-only /etc/rancher/k3s/k3s.yaml. With KUBECONFIG exported as above, prefer the plain, sudo-free kubectl form throughout this guide.
Note
The netbooted agents are diskless and are intentionally not in the agent inventory group, so pb-k3s-site.yml only installs the server. The agents join later by netboot (Step 8), not through this playbook.
Step 7 — Publish K3s Credentials For The Agents#
At boot, each agent’s k3s-auto-join.sh fetches http://<SERVICE_IP>:8080/k3s/token and http://<SERVICE_IP>:8080/k3s/kubeconfig. Publish both through Apache:
sudo install -d -m 0755 /var/www/html/k3s

sudo install -m 0644 \
  /var/lib/rancher/k3s/server/token \
  /var/www/html/k3s/token

sudo sed "s#https://127.0.0.1:6443#https://<SERVICE_IP>:6443#g" \
  /etc/rancher/k3s/k3s.yaml | sudo tee /var/www/html/k3s/kubeconfig >/dev/null

sudo chmod 0644 /var/www/html/k3s/token /var/www/html/k3s/kubeconfig
sudo systemctl reload apache2
Verify the endpoints respond:
curl -fsS http://127.0.0.1:8080/k3s/token >/dev/null && echo token-ok
curl -fsS http://127.0.0.1:8080/k3s/kubeconfig >/dev/null && echo kubeconfig-ok
curl -kfsS https://<SERVICE_IP>:6443/ping
The Apache ACL generated by the role allows your pxe_subnet and localhost. If an agent cannot fetch the token, recheck pxe_subnet and the generated Apache config.
Step 8 — Netboot The Agents#
On each agent machine: connect it to the same LAN as AIPC 1, enter firmware setup, disable Secure Boot, enable network boot, and put PXE before local disk in the boot order. BIOS and UEFI PXE both work — the role generates menus for both. Save and boot.
In firmware this is usually a Boot Device Priority (or Boot Order) screen listing each bootable device. You will see the local disk entry (for example SATA, SCSI, or NVMe) alongside one or more network-boot entries, named something like PXE, Network, IBA GE Slot ..., or ... etherboot. Move a network/PXE entry to the top so the machine attempts netboot before the local disk, then save and exit. The exact labels vary by vendor, but the goal is the same: the first boot device is the NIC, not the disk.
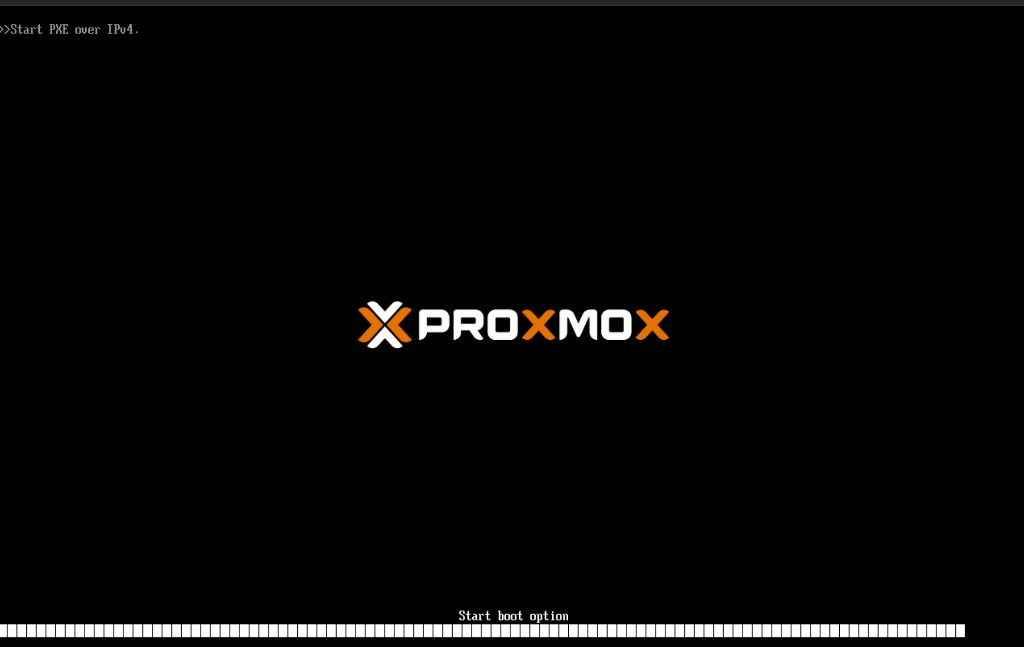
As the machine netboots you should first see a firmware line such as >>Start PXE over IPv4, then the PXE boot menu, where the default entry is AUP Learning Cloud K3s Agent (Network Boot). Let it boot (or select that entry). When it finishes you land at a console login prompt for the generated hostname, for example agent-bc-24-11-d1-a8-b2 login: — that confirms the NFS rootfs booted.
Note
The screenshots below use a virtual machine as the example agent (here a Proxmox VM), so your firmware and console will look different on physical hardware, but the sequence is the same.
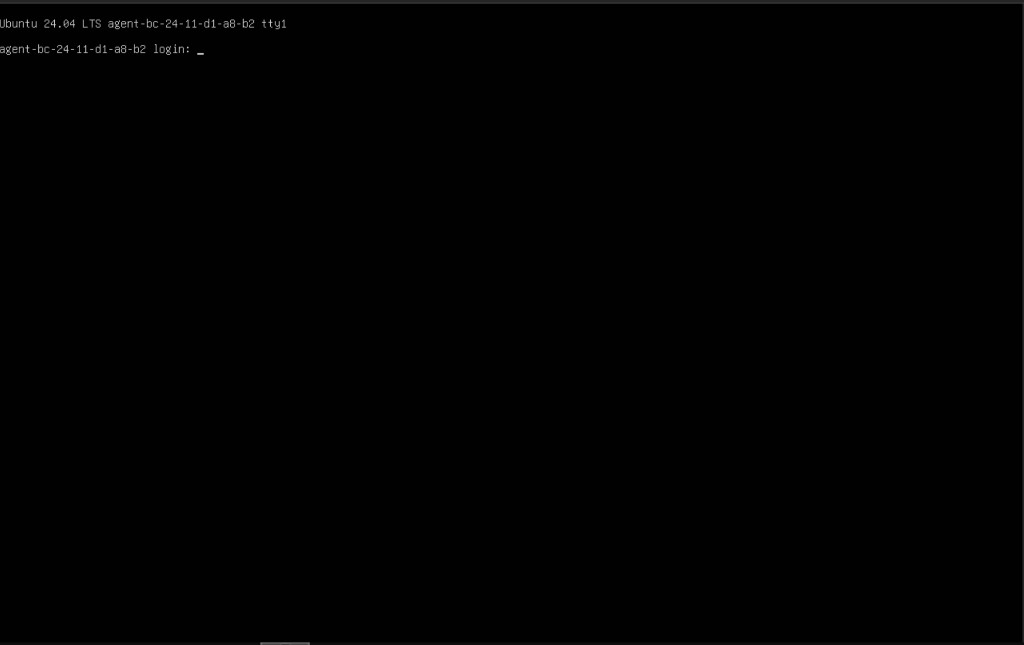
After boot, each agent mounts /srv/nfs/rootfs, sets its hostname to agent-<MAC>, mounts its local K3s persistence disk, fetches the token, and joins the server.
Watch node registration from AIPC 1:
watch kubectl get nodes -o wide
Expected: AIPC 1 is Ready, and each netbooted agent shows up as an agent-<MAC> node and becomes Ready.
Step 9 — Validate Agent Persistence#
Reboot one agent and confirm it rejoins with the same node identity rather than as a new node:
kubectl get nodes -o wide
On the agent, confirm the persistent K3s data mount and node password exist:
mount | grep /var/lib/rancher/k3s
test -f /var/lib/rancher/k3s/node-password && echo node-password-ok
systemctl status mount-local-disk --no-pager
systemctl status k3s-agent --no-pager
If an agent reboots but cannot rejoin, inspect the boot services on the agent:
journalctl -u mount-local-disk -n 100 --no-pager
journalctl -u k3s-auto-join -n 100 --no-pager
journalctl -u k3s-agent -n 100 --no-pager
If a stale node object blocks rejoin during testing, delete it from AIPC 1 and reboot the agent. This is a debugging action, not a normal operating procedure:
kubectl delete node <AGENT_NODE_NAME>
Step 10 — Install The AMD GPU Device Plugin And Labeller#
Deploy the AMD GPU device plugin and the ROCm node labeller so GPUs are schedulable and labelled:
kubectl create -f https://raw.githubusercontent.com/ROCm/k8s-device-plugin/master/k8s-ds-amdgpu-dp.yaml
kubectl create -f https://raw.githubusercontent.com/ROCm/k8s-device-plugin/master/k8s-ds-amdgpu-labeller.yaml
Verify GPU resources and labels on the agents:
kubectl get pods -A | grep -i amd
kubectl describe node <AGENT_NODE_NAME> | grep amd.com/gpu
Use the labels that actually appear on your agents when you write the chart values in Step 12. Common keys include amd.com/gpu.product-name, amd.com/gpu.family, and amd.com/gpu.device-id.
Example:
kubectl describe node agent-10-b6-76-52-64-02 | grep amd.com/gpu
Labels:             amd.com/gpu.cu-count=40
                    amd.com/gpu.device-id=1586
                    amd.com/gpu.family=GC_11_5_0
                    amd.com/gpu.product-name=AMD_Radeon_8060S_Graphics
                    amd.com/gpu.simd-count=80
                    amd.com/gpu.vram=64G
                    beta.amd.com/gpu.cu-count=40
                    beta.amd.com/gpu.cu-count.40=1
                    beta.amd.com/gpu.device-id=1586
                    beta.amd.com/gpu.device-id.1586=1
                    beta.amd.com/gpu.family=GC_11_5_0
                    beta.amd.com/gpu.family.GC_11_5_0=1
                    beta.amd.com/gpu.product-name=AMD_Radeon_8060S_Graphics
                    beta.amd.com/gpu.product-name.AMD_Radeon_8060S_Graphics=1
                    beta.amd.com/gpu.simd-count=80
                    beta.amd.com/gpu.simd-count.80=1
                    beta.amd.com/gpu.vram=64G
                    beta.amd.com/gpu.vram.64G=1
  amd.com/gpu:        1
  amd.com/gpu:        1
  amd.com/gpu        0               0
Step 12 — Configure JupyterHub Values#
Create a deployment-specific values file from the multi-node example:
cd ~/aup-learning-cloud/runtime
cp values-multi-nodes.yaml.example values-basic-example.yaml
# edit values-basic-example.yaml
At minimum set the auth mode, the GPU node selector to match your real labels, the notebook images, and the storage class. A NodePort proxy keeps the example simple:
custom:
  authMode: "auto-login"
  accelerators:
    strix-halo:
      nodeSelector:
        amd.com/gpu.product-name: "<GPU_PRODUCT_LABEL>"
      quotaRate: 3
  resources:
    images:
      cpu: "<CPU_NOTEBOOK_IMAGE>"
      gpu: "<GPU_NOTEBOOK_IMAGE>"

hub:
  db:
    pvc:
      storageClassName: nfs-client

singleuser:
  storage:
    dynamic:
      storageClass: nfs-client

proxy:
  service:
    type: NodePort
    nodePorts:
      http: 30890
Note
Use authMode: "auto-login" for this single-machine example — it is the chart’s intended single-node default (see the comments in runtime/chart/values.yaml) and drops you straight in as the student user. Avoid authMode: "dummy" here: its login form posts to /hub/native/login, which is not loaded in dummy mode, so the login returns 404 and you cannot sign in.
Warning
Do not reuse a site-specific values override as-is. It may contain real hostnames, OAuth settings, image tags, or registry credentials that must be replaced. For a private registry, create the image pull secret in the jupyterhub namespace before installing the chart.
Step 13 — Deploy AUP Learning Cloud#
cd ~/aup-learning-cloud
helm upgrade --install jupyterhub ./runtime/chart \
  --namespace jupyterhub --create-namespace \
  -f runtime/values.yaml \
  -f runtime/values-basic-example.yaml
Wait for the pods, then open the Hub. For the NodePort example, browse to http://<SERVICE_IP>:30890:
kubectl get pods -n jupyterhub -o wide
kubectl get svc -n jupyterhub
Step 14 — End-To-End Validation#
Validate the infrastructure first:
kubectl get nodes -o wide
kubectl get pods -A
kubectl get storageclass
kubectl describe node <AGENT_NODE_NAME> | grep amd.com/gpu
Expected: AIPC 1 and both netbooted agents are Ready; no platform pod is stuck in CrashLoopBackOff, Pending, or ImagePullBackOff; nfs-client exists; and AMD GPU resources/labels appear on the agent nodes.
Then validate the user path. Open AUP Learning Cloud in a browser — for the NodePort example from Step 13 that is http://<SERVICE_IP>:30890 (use your ingress host instead if you configured one):
http://<SERVICE_IP>:30890
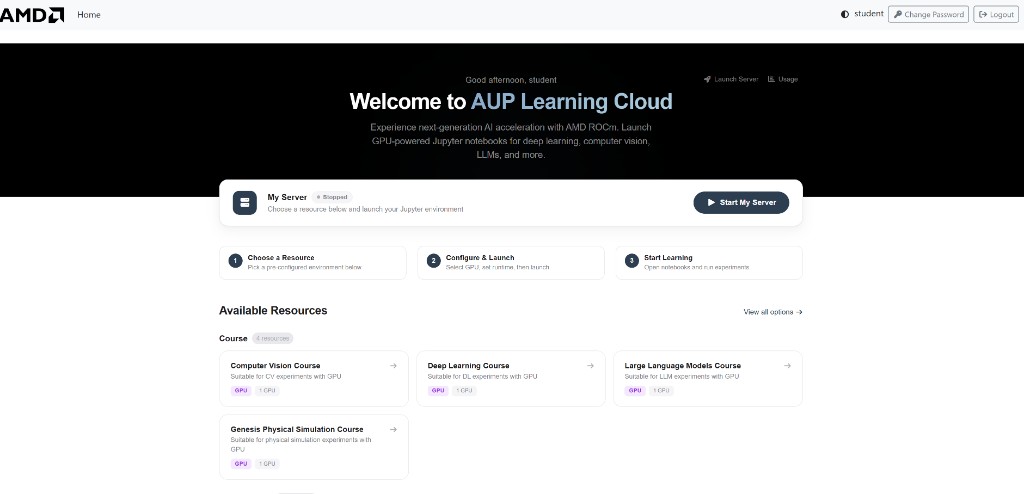
Log in, spawn a CPU notebook, create a file in the notebook home, restart the notebook and confirm the file persists, then spawn a GPU notebook and confirm its pod lands on a netbooted agent:
kubectl get pods -n jupyterhub -o wide
kubectl describe pod <USER_POD_NAME> -n jupyterhub
Troubleshooting#
Symptom |
Likely cause |
First checks |
|---|---|---|
Playbook fails immediately on an assert |
A required var is still empty |
Re-check |
Agent never shows the PXE menu |
Firmware boot order, network boot disabled, or Proxy-DHCP not reaching the client |
Check firmware, switch port, |
Agent gets an IP but cannot load boot files |
TFTP blocked, missing files, or UEFI Secure Boot still enabled |
Check |
Agent has no network during netboot |
Agent NIC has no in-kernel driver in the initramfs |
Identify the NIC with |
Agent kernel boots but cannot mount rootfs |
NFS export, subnet ACL, or wrong |
Check |
Agent waits for the K3s token |
Token not published or Apache ACL blocks the client subnet |
Check |
Agent joins once but fails after reboot |
Missing local K3s persistence or lost node password |
Check |
Agent fails to join with a version error |
Agent rootfs k3s version newer than the server |
Align |
GPU notebook stays Pending |
Chart |
Check |
PVC stays Pending |
StorageClass name mismatch or NFS provisioner cannot mount the export |
Check |
Out Of Scope#
The following are useful for a longer-running site but are not required for this minimal example: a Zot registry mirror, Cloudflare Tunnel ingress, monitoring and Grafana, HA K3s, external databases, and NPU-specific setup. Add them only after the minimal deployment can boot the agents, schedule GPU notebooks, and persist notebook storage.
Scope and Limitations#
This is a minimal teaching/lab example, not a production reference. To keep it to three machines, the service machine (AIPC 1) runs everything central on one host: the PXE controller, the TFTP/NFS rootfs, the Apache K3s credential endpoint, the single-node K3s server (control plane), and the notebook NFS storage. Keep these consequences in mind:
Single point of failure. If AIPC 1 goes down, the control plane, the netboot path, and notebook storage all go down with it. The agents also lose their NFS rootfs, so they cannot run while AIPC 1 is offline.
No high availability. There is one K3s server with embedded SQLite, no HA control plane, and no external database.
Shared resource contention. PXE/NFS/Apache/K3s-server and the notebook storage compete for the same CPU, memory, disk, and network on one box.
Storage durability. The example NFS export lives on AIPC 1’s local disk with no replication or backup; treat notebook data as disposable unless you add your own backups.
Agents are volatile. Netboot agents run from a read-only NFS rootfs with a tmpfs overlay; only the local K3s data dir persists across reboots.
For a longer-running or production deployment, split these roles onto separate hosts, use an HA K3s control plane with an external/replicated datastore, and back the storage with a dedicated, redundant NFS (or other) backend.